> ## Documentation Index
> Fetch the complete documentation index at: https://www.klaroai.ch/docs/llms.txt
> Use this file to discover all available pages before exploring further.
# Quickstart Guide
Welcome to Klaro AI. This page covers the core concepts you need to know on day one - what you're working with, how the onboarding flow sets you up, who can do what on your team, and why some features might ask you to upgrade.
***
## What is an agent? What is a workspace?
Two concepts show up everywhere in Klaro AI, so let's get them straight upfront.
**A workspace** is your account's home base. It holds your team members, your billing plan, and all your agents. Think of it as your company's account - everything you do in Klaro AI lives inside a workspace.
**An agent** is the actual AI chatbot you build. Each agent has its own:
* Name, branding, and widget appearance
* Knowledge sources (the content it's trained on)
* System prompt and behavior settings
* Conversation inbox
You can have multiple agents in a workspace (depending on your plan), which is handy if you're running different products, languages, or use cases.
> **tl;dr:** Workspace = your account. Agent = your chatbot.
***
## Your first time: the onboarding flow
When you create your first agent, Klaro AI walks you through a three-step setup wizard. Here's what each step does:
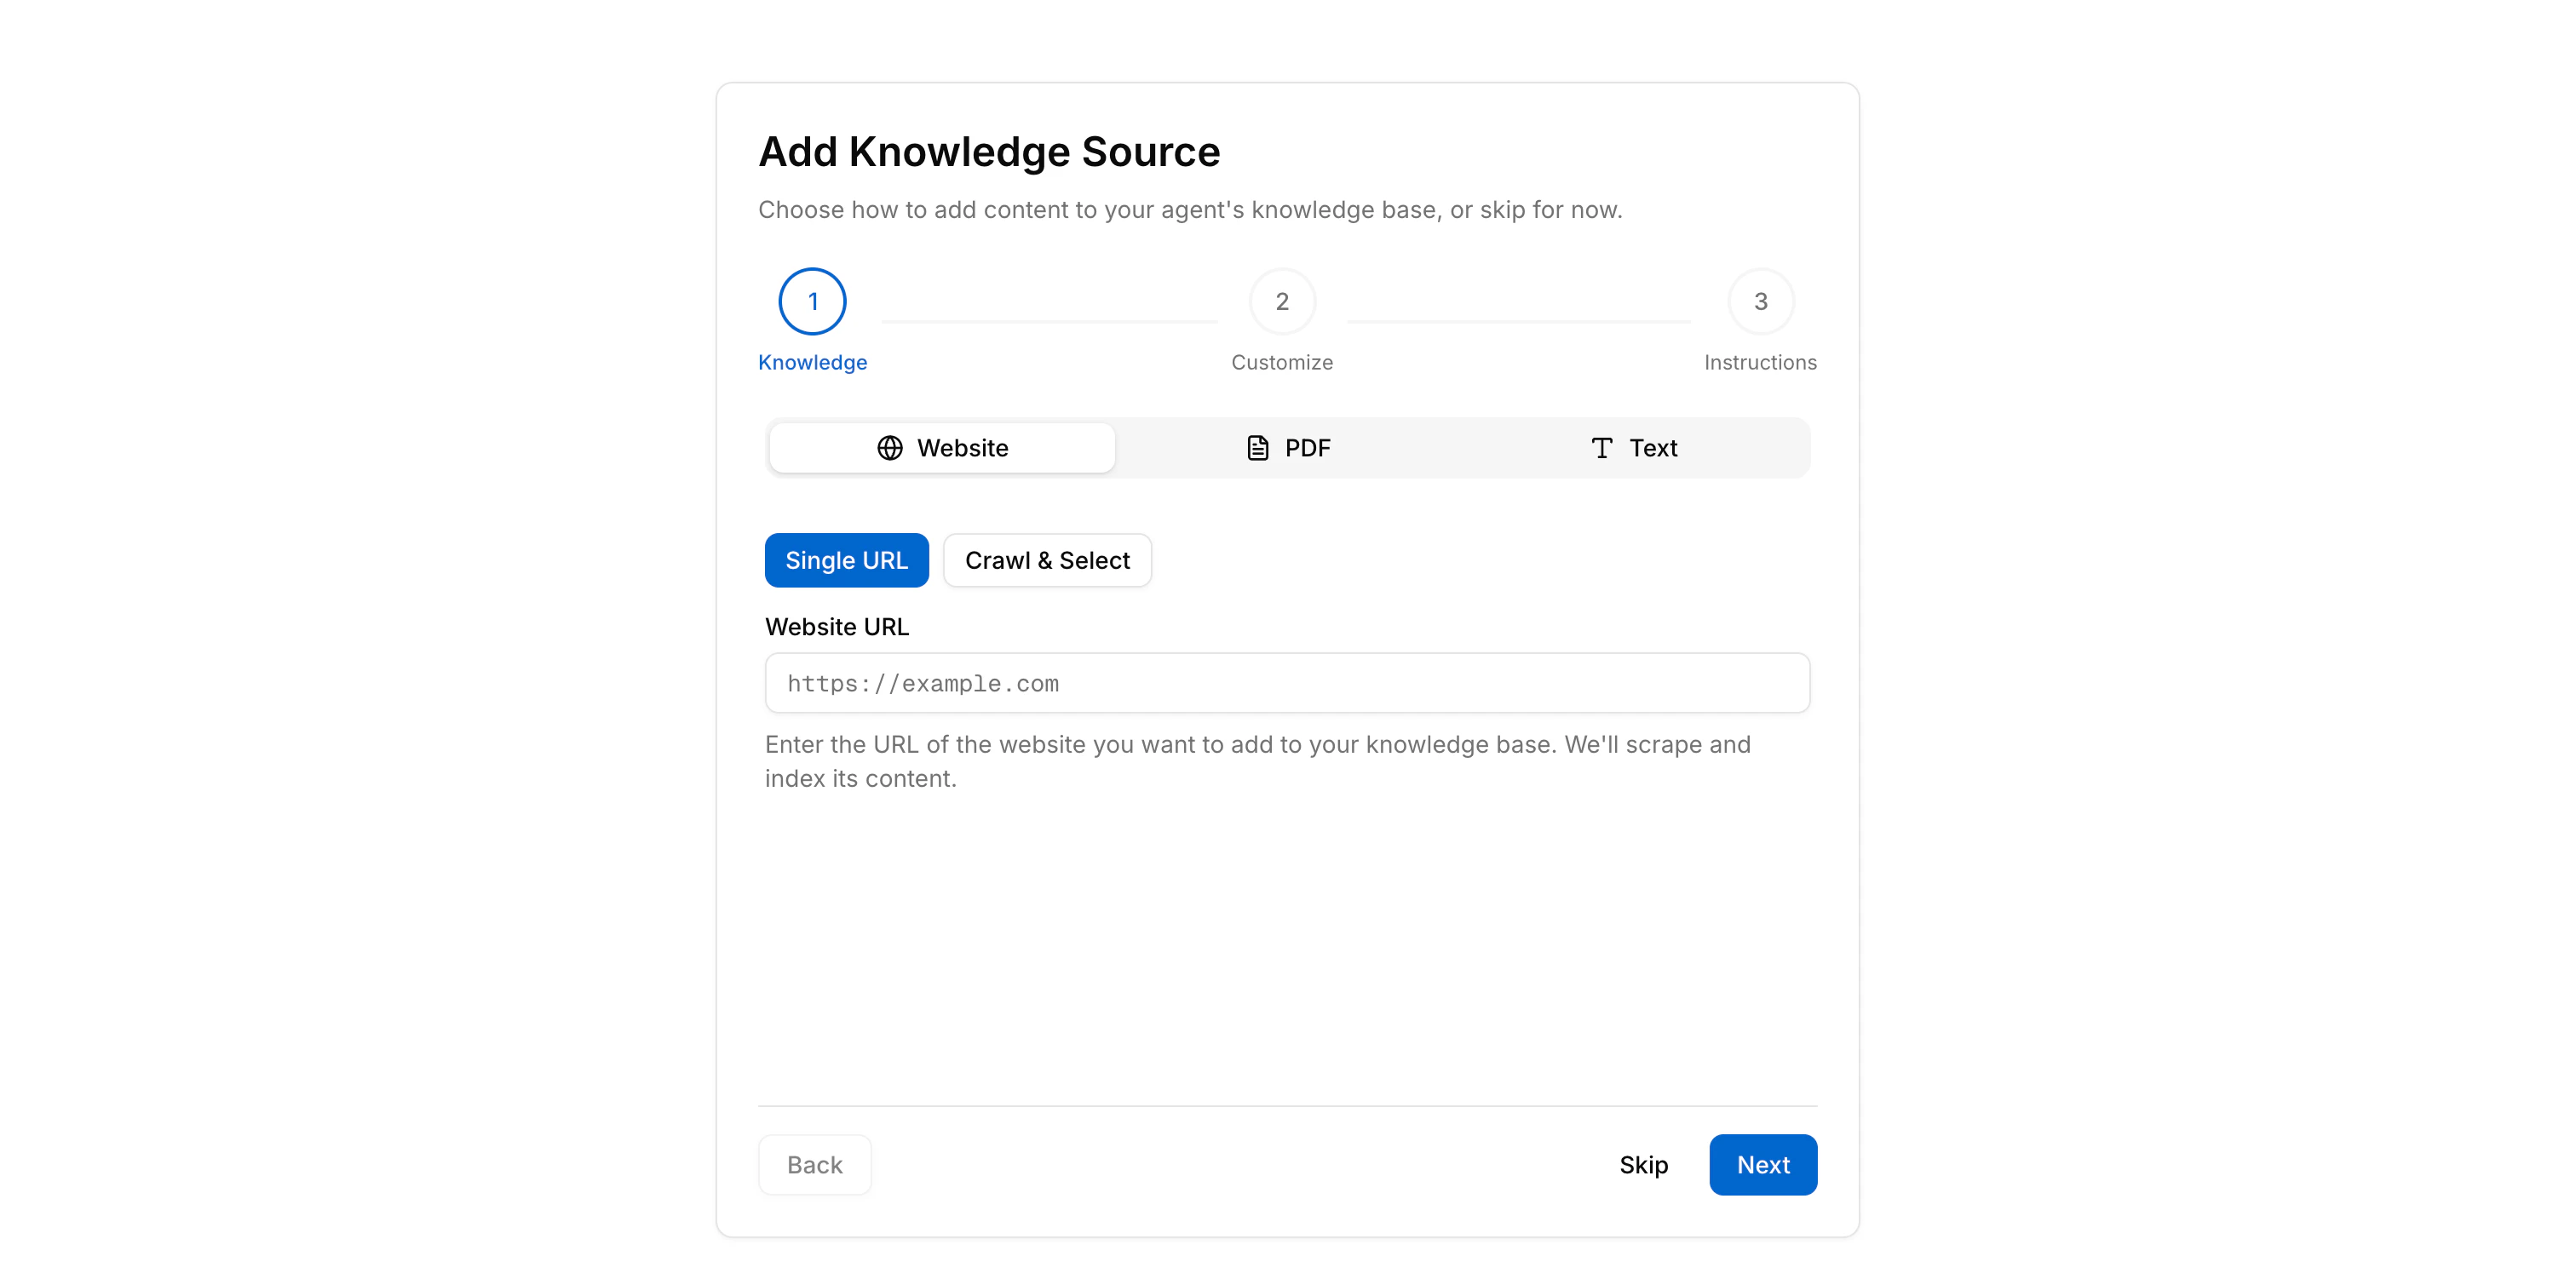 ### Step 1 - Add a knowledge source
This is where you give your agent something to know. You can add a website (Klaro will crawl it), upload a PDF, or paste in text directly.
You can skip this step and add sources later - your agent will still work, it just won't have any specific knowledge yet.
### Step 2 - Customize your agent
Give your agent a name and pick a primary color. You can also upload an icon and decide whether your branding shows in the widget header.
These settings affect how your agent looks to customers - you can always change them later under **Customize**.
### Step 3 - Set instructions
This is your agent's system prompt - the instructions that shape how it behaves. You can pick a starting point (General, Customer Support, or Sales) and adjust from there.
Use one of the presets and refine it once you've seen the agent in action.
***
### After onboarding: where to go next
Once you finish the wizard, you land on the **Dashboard**. From there, the sidebar is your guide:
### Step 1 - Add a knowledge source
This is where you give your agent something to know. You can add a website (Klaro will crawl it), upload a PDF, or paste in text directly.
You can skip this step and add sources later - your agent will still work, it just won't have any specific knowledge yet.
### Step 2 - Customize your agent
Give your agent a name and pick a primary color. You can also upload an icon and decide whether your branding shows in the widget header.
These settings affect how your agent looks to customers - you can always change them later under **Customize**.
### Step 3 - Set instructions
This is your agent's system prompt - the instructions that shape how it behaves. You can pick a starting point (General, Customer Support, or Sales) and adjust from there.
Use one of the presets and refine it once you've seen the agent in action.
***
### After onboarding: where to go next
Once you finish the wizard, you land on the **Dashboard**. From there, the sidebar is your guide:
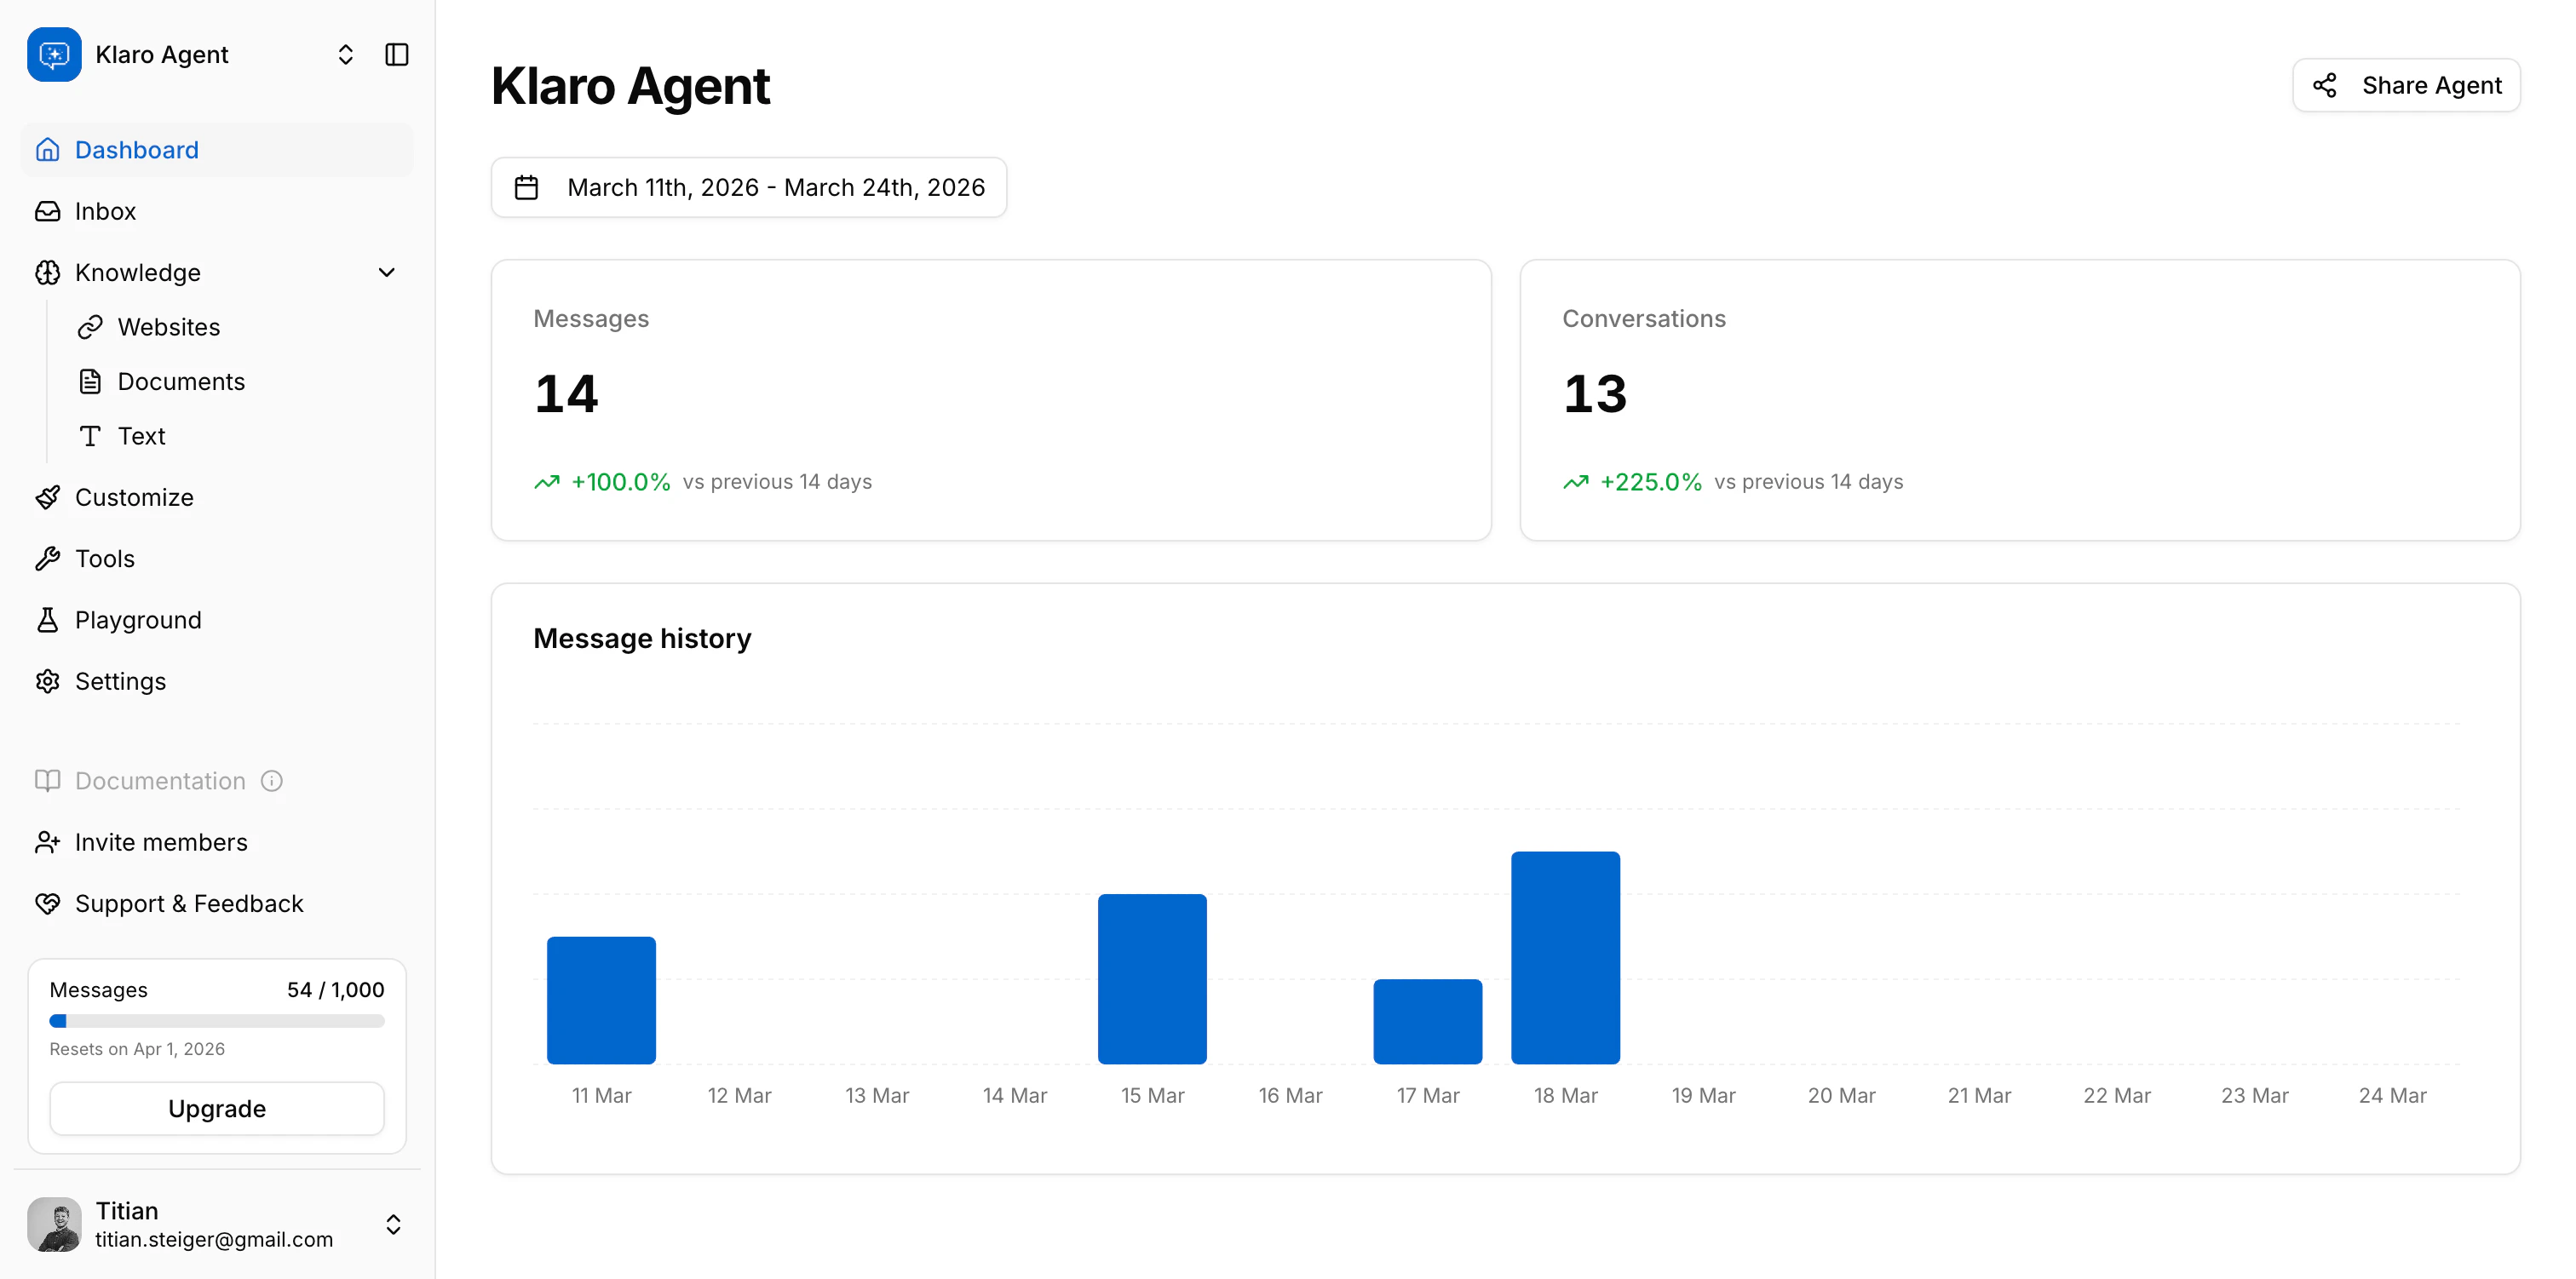 | Where | What you'll do there |
| --------------------- | --------------------------------------------- |
| **Dashboard** | See usage stats and embed your widget |
| **Knowledge Sources** | Add more content, check indexing status |
| **Customize** | Tweak branding, AI settings, and localization |
| **Tools** | Enable human escalation and lead capture |
| **Inbox** | See and respond to conversations |
| **Playground** | Test the agent live |
| **Settings** | Manage team members and billing |
***
## Workspace roles
Every member of your workspace has one of three roles. Here's what each can do:
| Role | What they can do |
| ---------- | -------------------------------------------------------------------------------------------------- |
| **Owner** | Everything - including billing, inviting members, and deleting the workspace |
| **Editor** | Create and edit agents, knowledge sources, and settings - but can't manage team members or billing |
| **Viewer** | Read-only access. Can browse conversations and agent settings but can't make changes |
When you invite someone, you assign them **Editor** or **Viewer** - only the original account creator is an Owner.
> **Billing is owner-only.** If a team member sees a message about upgrading but can't access the billing page, that's expected - send them your way.
***
## Why some features may be locked
Klaro AI has four plans: **Free**, **Starter**, **Builder**, and **Pro**. Certain features are gated by plan:
* **Agent tools** (human escalation, lead capture) require **Builder or Pro**
* **Removing Klaro branding** from the widget requires **Pro**
* **Usage caps** - messages per month, knowledge sources, website crawls - vary by plan
If you hit a limit or see a "requires upgrade" prompt, check **Settings → Billing** to see what your current plan includes and what the next tier unlocks.
| Where | What you'll do there |
| --------------------- | --------------------------------------------- |
| **Dashboard** | See usage stats and embed your widget |
| **Knowledge Sources** | Add more content, check indexing status |
| **Customize** | Tweak branding, AI settings, and localization |
| **Tools** | Enable human escalation and lead capture |
| **Inbox** | See and respond to conversations |
| **Playground** | Test the agent live |
| **Settings** | Manage team members and billing |
***
## Workspace roles
Every member of your workspace has one of three roles. Here's what each can do:
| Role | What they can do |
| ---------- | -------------------------------------------------------------------------------------------------- |
| **Owner** | Everything - including billing, inviting members, and deleting the workspace |
| **Editor** | Create and edit agents, knowledge sources, and settings - but can't manage team members or billing |
| **Viewer** | Read-only access. Can browse conversations and agent settings but can't make changes |
When you invite someone, you assign them **Editor** or **Viewer** - only the original account creator is an Owner.
> **Billing is owner-only.** If a team member sees a message about upgrading but can't access the billing page, that's expected - send them your way.
***
## Why some features may be locked
Klaro AI has four plans: **Free**, **Starter**, **Builder**, and **Pro**. Certain features are gated by plan:
* **Agent tools** (human escalation, lead capture) require **Builder or Pro**
* **Removing Klaro branding** from the widget requires **Pro**
* **Usage caps** - messages per month, knowledge sources, website crawls - vary by plan
If you hit a limit or see a "requires upgrade" prompt, check **Settings → Billing** to see what your current plan includes and what the next tier unlocks.
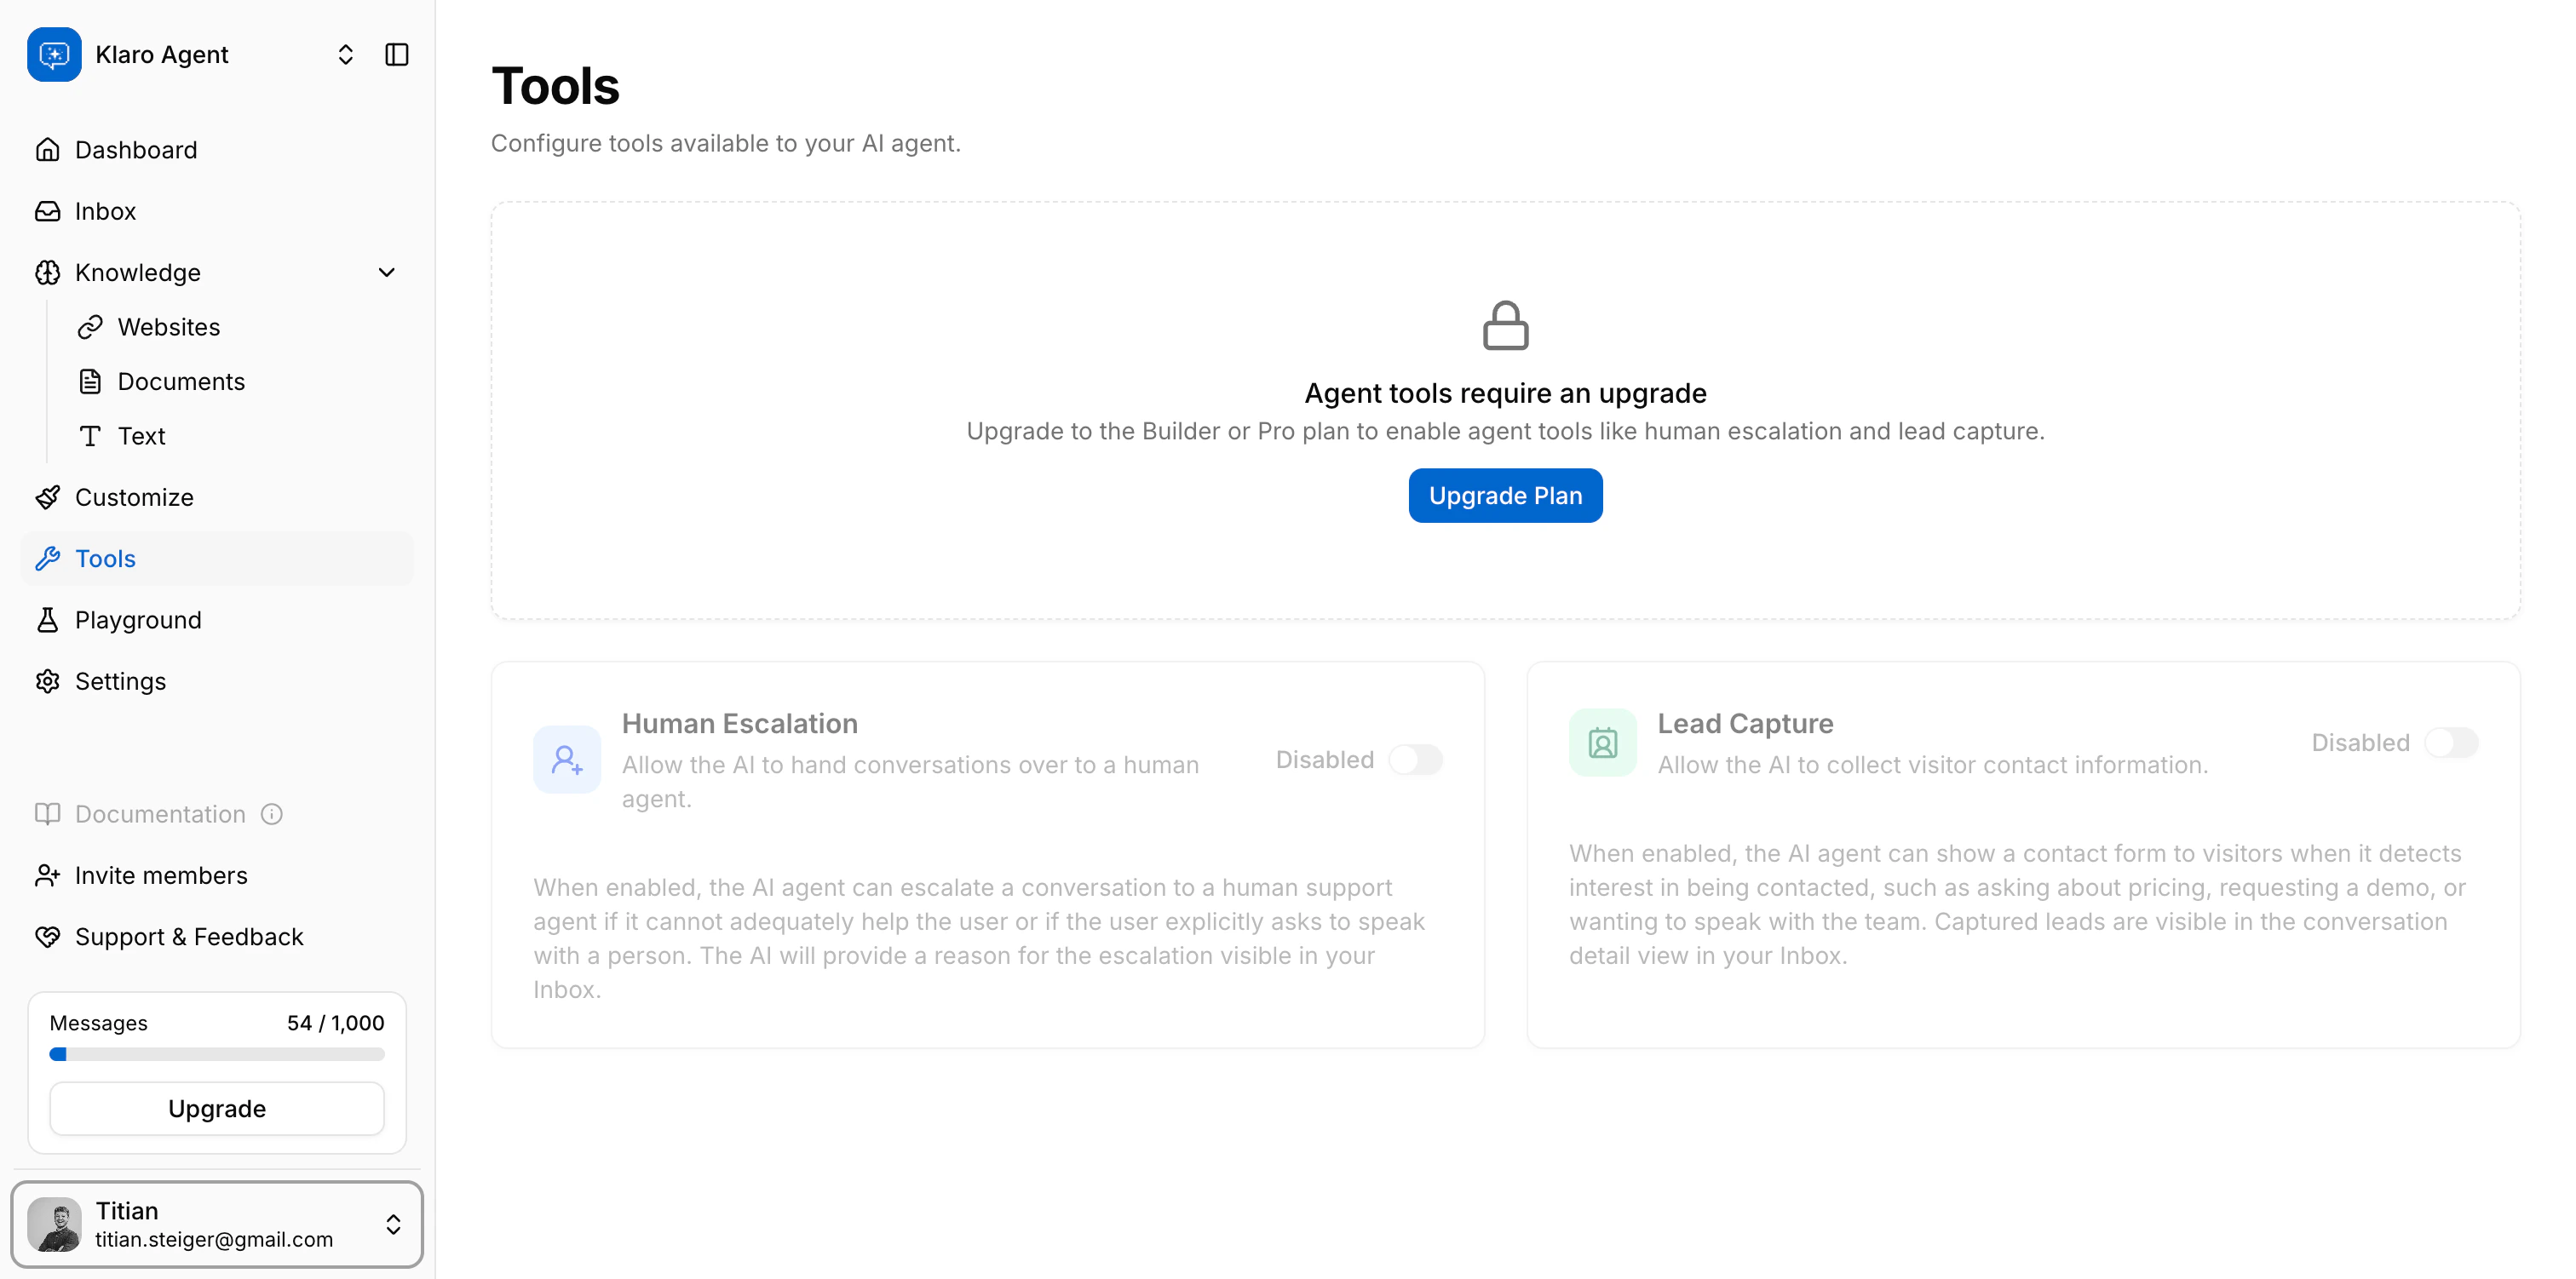 > If you're not the workspace owner, you won't have access to the Billing page - ask your owner to review the plan.
***
**Next up:** [Configure → Customize](../en/configure/knowledge) - set your agent's name, colors, AI behavior, and content settings.
> If you're not the workspace owner, you won't have access to the Billing page - ask your owner to review the plan.
***
**Next up:** [Configure → Customize](../en/configure/knowledge) - set your agent's name, colors, AI behavior, and content settings.